Tag: vapour organic beauty


Look Perfectly polished in nothin’ but the basics.

April 15th, 2014 — 6:02pm

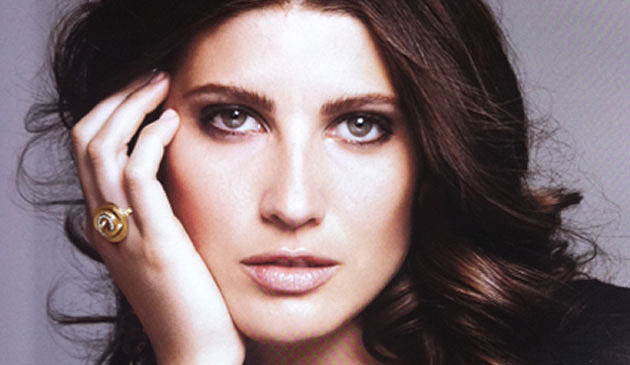
MicheleAlvez_makeup_basics


Every season, fashion and beauty magazine editors and bloggers ask me “ What are the top 5-10 things every woman must have in her makeup bag?”

My answers vary slightly, depending on the age of their readership, but overall I’m known to favor keeping makeup rather simple and timeless.  To me it’s always been about enhancing ones’ features, which can be done with just a few simple products.

Please don’t mistake my short list of musts for a lack of support for those of you who want to experiment with wild eyeliner hues and bold, trendy lip color. I’m a big fan of that sort of thing, as well. But first I think it’s important to iron out the basics, and find what works best to enhance your favorite features, keeping your every day look as fresh-faced and minimally made up, as possible.  Once that’s established, playing with extras is a breeze.

In writing this post, I’m assuming you’ve gotten your skin care regimen down, and are starting with hydrated, nourished faces. This is not such an easy feat for so many of us, and if you’re having difficulty in this venue, the good news is, there are countless treatment options in the green beauty world for every skin type. It just takes some research and often a bit of trial and error.

So… what do I think no woman should live without (I really don’t feel that you couldn’t live without makeup – or things in general – but I think you know what I mean).

  1. A good eyelash curler. My favorite has been the one by Shu Umera because of the texture and shape of the pad, and overall shape and sturdiness of their handle and the part into which the pad fits.
  2. A creamy, neutral eyeliner. Depending on your hair and eye color, as well as your skin tone, and personal preference, this could be a pale taupe, a deep brown, a medium gray, or a deep, dark black.  Keep some cotton swabs on hand to smudge the line you draw, buffing it out ever so slightly.
  3. A mascara that gives the look you favor, whether that’s longer, thicker, darker, or all of the above. (I prefer all of the above)
  4. Tweezer. I can’t emphasize the benefit of a good tweezer enough. Shaping your brows and whisking away unwanted hairs from other regions of the face where they begin to show up – it’s  a necessity.  I’ve been a fan of  the Rubis for years, but it’s really all about finding one that feels right in your hand.
  5. Two cheek colors: one that makes you look warm and glowy, and one that mimics the color your cheeks turn when your heart rate has been pushed. I generally favor creamy cheek colors, but this is a personal preference thing.
  6. Two concealer shades: one with a bit more peachy/orange undertone to cut the purple inherent in under eye circles.  Then, one concealer that matches your skin tone and texture perfectly to cover spots as needed. I always like to finish a concealer/tinted moisturizer/ foundation application by pressing a slightly dampened beauty blender sponge into the skin to ensure that the texture of the product matches the texture of your skin. Don’t skip this step if can help it.
  7. 3 lip colors. Most women I know have many more than this, but honestly, if you have limited funds, a desire to keep your purse as light as possible, or become overwhelmed at the thought of keeping up with lip trends, three shades is perfect. I’d start with a sheer, tinted lip balm in a color that’s pretty similar to your lips, add a similar shade in a proper lipstick formulation that’s somewhere in the satin range – moist, not matte, yet not glossy, and finally, a color that you love, and that gets smiles from others when you wear it – could be a bright pink, an orangey red, or a deep berry.
  8. A sheer gloss. I lied – having a fourth lip product that feels good and has a bit of a moist look is always a good idea. This can be layered over any of the above, or worn alone when you’re feeling glossy.
  9. An eyebrow brush/pencil/powder/gel: When we’re young, our brows are usually at their fullest. You may want to brush them into a lovely shape in the morning and forget about them. As we age, however – even as early as in our early 30’s, our brows may start to look a bit less full, particularly towards the tails. Finding a brow pencil or powder that looks super natural is the way to go. Light strokes, mimicking the hair growth pattern is all you need, along with good lighting, to create a frame for your face. I’ve just recently found Eco Brows, a richly pigmented brow gel product in a pot, and really like it. I also love the fine point and ease of use of the brow pencils from MAC.

There you have it.

Here are some of my current favorite all natural products you can use to create this very pretty, basic look I did on my friend, the gorgeous model, Michele Alvez:

Comments Off on Look Perfectly polished in nothin’ but the basics. | ...Here's how to

The Beauty Of It Is + Spirit Beauty Lounge + Burt’s Bees bring you three weeks of ‘for the love of green beauty’ gift giveaways!

February 6th, 2014 — 6:31pm

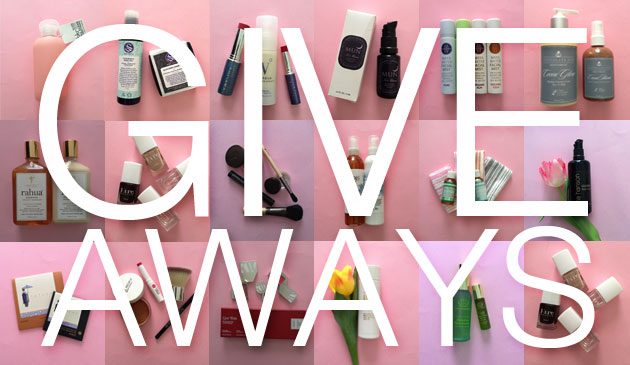
grid_giveaways

Happy Valentine’s Month beautiful readers!

I’ve never won anything. (At least not anything that I really wanted.) Have you? Spirit Beauty Lounge and I have teamed up to make it happen for 18 of you! Let the ‘for the love of green beauty’ gift giving begin!!

Every weekday for the rest of this month you have the chance to win one of the beautiful gifts featured above.  There’ll be a mixture of our favorites in green beauty, from skincare and haircare to makeup and nail polish from brands like Lina Hanson, Kjaer Weis, Tata Harper, Ila, W3LL people, Rahua, RMS, Mun, Strange Invisibles, Maya Water, Vapour Organic Beauty, Soapwalla Kitchen, Chocolate Sun, Alima Pure, Tatcha, Dr. Bronners, Kure Bazaar, BKR.

It’s super simple to enter; just click through the prompts on my Facebook page. The first giveaway is the delicious face oil from Mun… you won’t be disappointed!!!

oxoxoxoxoxoxoxo


Comments Off on The Beauty Of It Is + Spirit Beauty Lounge + Burt’s Bees bring you three weeks of ‘for the love of green beauty’ gift giveaways! | ...I love this

get Olivia Munn’s glowing skin and smokey bronzed eye

July 13th, 2013 — 9:04pm

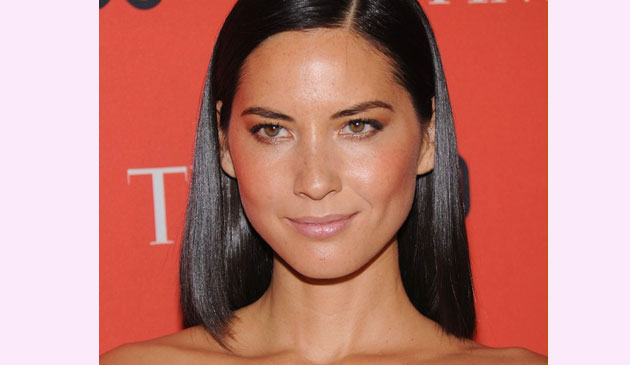
Olivia_munn_blog_opt1

This image was taken the first time I worked with Olivia a few months ago. I’d always admired how great her makeup looks on the red carpet, and always thought she was one of the most beautiful actresses around. Olivia definitely knows how she looks her best – from the shape of the eyeshadow, to the angle of the eyeliner, and the placement of contour and cheek color. She shared with me that she’s worked with a fantastic makeup artist in Los Angeles for many years, and from the pictures she’s shown me from the events where she’s done her own makeup, it’s obvious that she, herself, seriously knows how to paint her own face – and put on false eyelashes better than anyone else I’ve ever known!

Before I tell you how to recreate this makeup look for yourself, I want to share with you this story:

Recently I arrived at Olivia’s hotel room to do her makeup for a TV show appearance. Before taking a seat in front of me, she reached into her purse and pulled out small bag containing a bottle of nail polish and a bottle of polish remover she’d just picked up at Whole Foods.  I was so excited (as only a green makeup artist can be) by what I saw.  Of all the options she had between the equally as close in proximity drug store, mainstream grocery store, and beauty supply shop, she made it a point to spend her dollars on nail products that are made by companies that have made a concerted effort to be as toxin-free as possible. The color was a killer shade of red, and the remover worked extremely well to remove the polish she started out wearing.  It’s the little purchases like this that say a lot. Companies that attempt to do better for the environment and for their consumers need our support.

Just one more reason why I’m so stoked to work with Olivia. Plus she personally makes the rounds to say thank you, and shakes the hand of every single person that had even the smallest roll on whatever photo or video shoot she’s working on. Who does that?! Olivia does, and it makes everyone feel *so* good.

Okay, back to telling you how you can make your own face glowy and bronzed:

FACE:

  • I favored a really dewy complexion for this glowy look. I started with a tiny bit of La Bella Figura’s Rainforest Hydration Treatment and thoroughly massaged it into her face and neck. A little goes a long way to intensely hydrating skin. I waited about 20 minutes until it had fully absorbed to begin perfecting her skin, which works out well since I always start with eye makeup first.
  • Once I finished her eyes, I used Vapour Organic Beauty’s Atmosphere Luminous Foundation Stick, applied with a small foundation brush, and worked it into the areas in need, patting it into place with a damp – but not at all wet to the touch – beauty blender sponge.
  • I started building the bronzed glow by first laying down a layer of cream highlighter from RMS beauty (living luminizer) on the areas of her face that I wanted to reflect the most light in front of the paparazzi: the bridge of her nose, her cheekbones and her cupids bow.
  • It wasn’t until I was nearly finished with the rest of her makeup, that I went back and mixed two colorful shades of Vapour cream cheek stick color in Torch and Courtesean  on my small, fluffy brush, and swirled them around the apples of her cheeks, just to give a brightness to her face.
  • Then I went to work with my favorite Dr. Hauschka powder bronzer, placing it onto her skin with a large, fluffy, super soft powder brush. The trick when powdering on top of cream is to make sure the cream has set as much as it can, and then place the powder color on top with a large brush. If you buff it too much you run the risk of smearing the cream below and creating streaks.
  • To finish her cheeks, I went back with a matte brown bronzer called Mauna Lao, from Alima Pure to add more definition to her cheekbones, and I softly placed the powder underneath them with a small eyeshadow blender brush, to really make them pop.

ON HER EYES:

  • I love Kjaer Weis’ eyeshadows and use them all the time. Here I placed ‘Charmed’ under her eye, and then over her entire lid, blending it upwards for a sheer application from crease to brow. Then I used my same Dr. Hauschka’s matte bronzer with a fluffy eyeshadow blending brush to create a little depth in her crease, particularly towards the outer edge.
  • It’s no secret that I love some serious lashes, so I curled the heck out of hers, and then applied 400 coats of covergirl lash blast, in very black (and a few individual fake lashes from Ardell for a little extra depth)
  • I filled in her brows with a deep brown brow pencil

ON HER LIPS

Et voila.

Thanks to Glamour magazine for calling Oliva’s look out in July’s issue as a beautiful way to bronze!

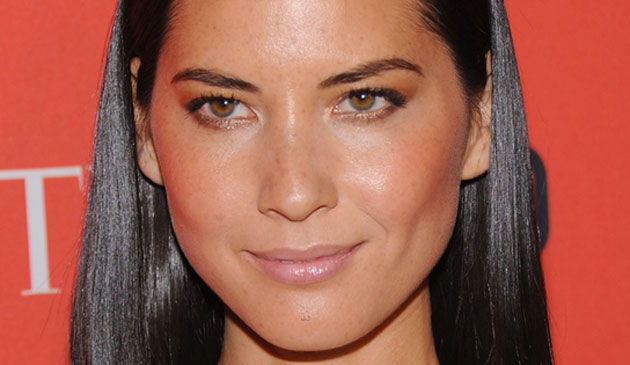
Just look at that face! Gorgeous!

olivia_munn_close_up_blog

Comments Off on get Olivia Munn’s glowing skin and smokey bronzed eye | ...Here's how to

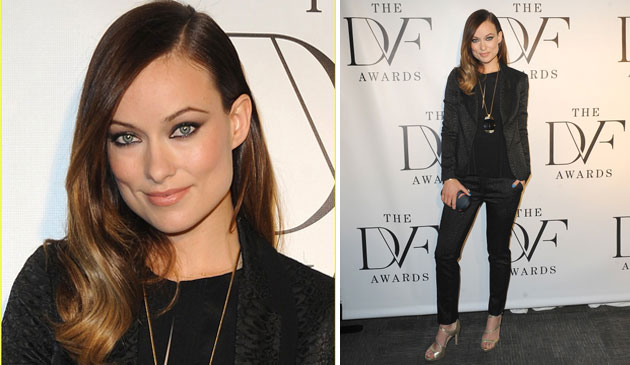
Get this sultry yet understated eye & glowing skin I created for Olivia Wilde last night

April 6th, 2013 — 4:00pm

blog_Olivia_Wilde_DVF_Awards2013

Every year the iconic designer, Diane Von Furstenberg, throws an awards event to provide recipients with the exposure and resources needed to extend their critical efforts on behalf of women’s causes. Four individuals are honored who have displayed leadership, strength, and courage in their commitment to their causes, and this year, the beautiful Olivia Wilde was a presenter. I’m always happy to get clients ready for a red carpet event, but when it’s for a cause that’s so near and dear to my heart, it makes it all the better for me.

When I got to Olivia’s apartment about two hours before she had to leave for the event, she showed me the gorgeous black pants suit she and her stylists had chosen, and said: “I don’t know, I was thinking we should play up my eyes”.  On my way to her place I’d been looking at photos of her from previous red carpet events -which I do before meeting with every client – to see which looks I liked her in the most. Olivia usually goes for a dramatic black liquid cat-eye or a rounded, very intense dark smokey eye, and in the moment she said “let’s play up my eyes”, what felt like 500 images of fun things I could do flooded my head. As her hairstylist began running mousse through her hair, I stood staring at the shadows and liners I’d laid out on her dining room table, trying to decide which colors to swirl around her eyes, and in what shape.

I knew I needed a minute to come to a decision, so I did what I usually do, and started with a face oil massage to get her circulation going, and to zone out on her face while she had her eyes closed. Within seconds it came to me, and I saw the completed look in my head, even before the oil had time to absorb.

The glowing skin is ultimately courtesy of Olivia’s genes, of course, but I also always give a lot of credit to the base layer of hydration I lay down before I draw and paint on the skin, and in this case, Lina Hanson Global Face Serum made for a truly glowing-from-within look. Plus, the aromatherapy this oil provides to my clients (and to me) during the face massage has made it a mainstay in my kit (and my medicine chest). The scent is incredible, and the viscosity is perfect.

As for her beautiful eyes: I used three simple products:

  1. a pale, sheer shimmery slate gray,
  2. a medium dark matte smokey graphite gray, and
  3. a black creamy eyeliner.

First I mapped out the overall shape I wanted using the pale gray. On top of that I precisely placed the medium/dark matte gray along the crease and outward, extending slightly up from the outer corner of her eye, and then I blended the hell out of it so there would be no apparent edge between the two shades. Then I went in with a black liner and thoroughly applied it on the inner rim of top and bottom lid, as well as dotted in between lashes. To complete the look I smudged it into the lash line on both bottom and top lid using a smudge brush.

I really love how this look turned out… and it’s just like I saw it in my head during the face oil massage!

One final note: since everyone always wants to know the answers to these two questions about my clients,  I will tell you: Olivia is incredibly nice, and super beautiful in person without a lick of makeup.


Comments Off on Get this sultry yet understated eye & glowing skin I created for Olivia Wilde last night | ...Here's how to

More reasons to love the Fall… Rich berry colored lips!

October 13th, 2012 — 12:23am

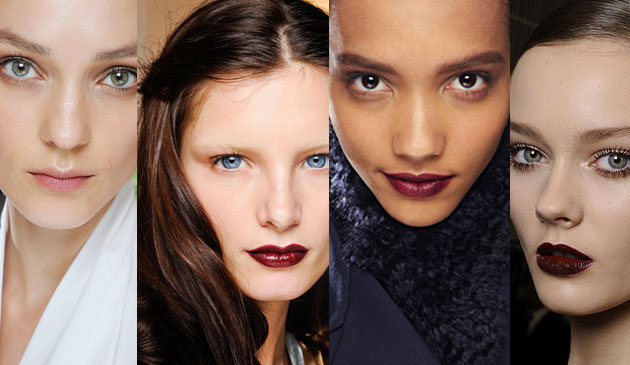
Fall: It’s that sweet spot between end of the summer and the start of the holiday season. It’s time for you to break out those gorgeous fall lip colors and see how fun they are to wear. Choose from a barely there sheer wash of color, super pigmented mattes, and glossy payoffs.

A good number of you have asked me for a lip color round-up to introduce you to some of the shades we see this time of year on the runways and red carpets:  deep, rich plums lipsticks, purple-y red glosses, satin-finished blackberries, and sheer merlot stains. It’s not always easy, though, to gauge just how this type of color is going to look on the lips.

The finished product not only depends on the way in which you apply:

1. directly from the tube, with a heavy hand, in a smeared, back-and-forth motion;

2. from the tube, but only lightly dabbing the stick onto your lips;

3. with a lip brush to make a precise edge;

4. by tapping your finger from the tube to your lip, adding layers of pigment until you reach the desired intensity level,

but it also depends heavily on what your natural lip color is before you start applying.  Those with a lot of pink or red in your lips are going to find that the deep purple wine stains can take on a completely different hue, and those of you with a really deep brown color to your lips may find that some of these shades disappear completely on you, or never show up with enough intensity, no matter what you do.

All of that said, it’s really difficult for someone like me (or a makeup company, for that matter) to definitively advise you on what to buy based on how you look sans lip color.  I can however, suggest shades to play with, and tell you my favorite ways to apply them. What should ultimately influence your decision when you’re standing at a makeup counter, or staring at lipstick swatches on the screen of your computer, wondering: when was the last time my  laptop’s color temperature was calibrated? [NEVER?!] are variables like: your eye color, your hair color,  your skin tone, your clothing color palette, your mood…

In no particular order (really, just the order in which I pulled them out of my big ol’ bag of lipsticks), here are some of my favorites. Those of you who follow this blog based on our shared love for ‘green’ beauty options, please take note that there are a handful of lip colors that don’t fall into that category, however, they’re such rich and dense shades – shades which are not readily available (or at least not that I know of!) in the all-natural world of lip color – that I often use them on photo shoots when I need that intensity. I did just check Jane Iredale’s webiste and found that she has a few deep purple shades that I have not yet tried.

HOW TO GET: NOT TOO HEAVY, NOT TOO LIGHT: THE PERFECT APPLICATION OF COLOR

When you’re new to wearing these shades, it can be overwhelming to see yourself with a thick application of. let’s say, Ilia’s ‘Ink Pot‘, or Mac’s ‘Rebel’ (which are very similar in color).  Instead, try tapping the lipstick onto your lightly lip-balmed lips, or use your ring finger to tap a good amount of product from the tube, and then press the pigment into your lips. This is how I generally apply all lipstick, even on myself. It helps to ensure less caking along the corners of your mouth as the hours pass, and through the act of pressing the product into your lips, you’ll find it sticks around longer than if you simply swipe the tube across your pout once or twice.

HOW TO GET: SHEER COLOR WITH A DEWEY FINISH

There are a multitude of great sheer options on the market that are easy to apply, and the more swipes across your lip, the deeper the shade becomes. My top favorites include: Burt’s Bees Lip Shimmer in’Prune’ and Kjaer Weiss’ ‘Sensuous Plum’.

HOW TO GET: SHEER GLOSSY LIPS

Trying out a lipstain, like ‘Quickstep or ‘Foxtrot’ [Foxtrot not pictured below]’ from Josie Maran is another great way to become acquainted with these shades. To start, color the marker onto UNMOISTURIZED lips (this is important to ensure the color will adhere), and then try following up with a gloss, like the gorgeous blackberry one from Vapour Organic Beauty in ‘Bitten‘, or their more chocolate shade ‘Risque‘. This makes for a luscious and easy to wear fall shade.

HOW TO GET: INTENSELY COLORED, MATTE OR SATIN FINISH LIPS

If you’re going for a much more dramatic look, make sure that your lips have been moisturized, but then blot them with a tissue, to ensure that your deep lipstick of choice adheres evenly, and depending on the look you’re going for, you might want to lightly outline your lips in a similar shade lipliner to ensure the color doesn’t bleed.  I wouldn’t advise that a dramatically deep, highly pigmented purple or merlot shade (like the one pictured on the model in the photo on the right) EVER be  highly glossy (i.e. adding gloss on top of the lipstick) in real life (a photo shoot is a different story). It’s guaranteed to slide off your lips, appear blotchy, and get on your teeth. This means that a super deep shade should be in a matte, satin, or have a super light dewey finish. It’s a great idea to lightly touch a tissue onto a closed mouth to ever so slightly remove excess product. My picks to accomplish this kind of look: NARS, ‘Train Bleu’ matte lip pencil, Chanel ‘Rouge Noir’ Lipstick, MAC Smoked ‘Purple Matte’ Lipstick, and Vapour Organic Beauty ‘Siren Bold’ Lipstick.

HOW TO AVOID:  THE DREADED LIPSTICK ON YOUR TEETH LOOK!

My grandmother showed me the best way to ensure that this embarrassing faux pas doesn’t happen:

1. after applying your lip color, open your lips into an ‘O’ shape.

2. grasp a cotton swab by the middle between your pointer finger and thumb, placing one end of the swab into your mouth, keeping your fingers on the handle, just outside of your mouth with the other cotton bud end pointing straight out, parallel to    the floor.

3. Pucker your lips like you’re  blowing a kiss around the handle of the swab, and gently pull the swab out of your mouth, making sure the inside of your lips comes in contact with the cotton as it leaves your mouth.

4. Repeat with the other side of the swab.

Voila – all of the excess color that would’ve ended up on your teeth has been swept away! Packing a few q-tips in your purse is always a good idea, to use for this trick, or to clean up fallen mascara.

The final two shades on the bottom right of the photo below are soon to be released, are part of the ‘green’ family of beauty products, are super affordable, and super beautiful. Once they hit the market I promise to tell you who makes them!

Happy leaves-changing, sweater-wearing, chilly hands, feet, and noses, FALL WEATHER everyone!


Comments Off on More reasons to love the Fall… Rich berry colored lips! | ...Here's how to, ...I'll test it for you

Get The Look Numero Uno: Sheer taupe eye with a 2-dimensional red lip = Shazaam!

August 20th, 2012 — 8:02pm


Today marks the start of a beautiful partnership.  Spirit Demerson, founder and owner of Spiritbeautylounge.com, the wonder woman who introduced me to so many fantastic green lines of makeup and skin care, and I, are teaming up to bring you ‘get the look’ blog posts.

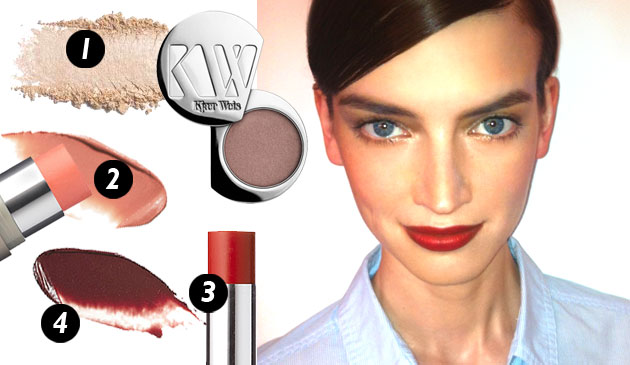
I do the makeup while on a photo shoot, take the model’s picture at lunchtime, and send it off to Spirit to pair it with images of the products I used. Hallelujah!  This will make it so easy for you to quickly ‘get the look’, because you’ll be able to see the exact products I used, read how I used them, and click on the link to Spirit’s site to buy them. Couldn’t be easier.

To kick things off, please allow me to present the lovely Canadian model, Marla Boehr.

I prepped her skin by massaging in a few drops of Ila Rose Oil to combat the in-flight dryness I saw around her eyes, nose, cheeks, and mouth (She’d just flown in from Canada).

On her skin:
On her t-zone I sparingly pressed liquid foundation from Vapour Organic Beauty in number 125 and to make the finish look like bare skin, I lightly pressed it in with a slightly dampened beauty blender sponge.

On her eyes:

1. All over the eye area I pressed Kjaer Weis’s charmed shadow in a very sheer application with a medium domed brush. I blended it from the lid up all the way to her brow, sheering it out the further away from her lid I got. I swept some underneath her bottom lashes from edge to edge, as well.

In the crease of her eye I pressed a more tightly-domed shadow brush topped with  Kjaer’s shadow, Wisdom, and used a fluffier domed shadow brush to really blend it into the crease. I took what was left of the shadow on the tightly-domed brush and concentrated the placement of it under the iris, while using a cotton swab to barely blend it towards the edges.

In the inner corner of her eyes I pressed Kjaer’s shadow, Cloud Nine, which really made her eyes pop.

On her cheeks:

2. Onto a soft-tipped fluffy, but not densely packed brush, I blended together Ilia’s ‘All Of Me’ and ‘I Put a Spell on You’ and swirled it onto the apples of her cheeks. I used the same sponge I used on her t-zone to gently blend out the edges.

On her lips:

3. & 4. I used a combination of Ilia’s ‘Femme Fatale’ and Vapour Organic Beauty’s ‘Siren Ravish’ lipstick.  I first pressed Siren Ravish into her lips, and had her mash her lips together to really stain them. Then I applied Femme Fatale with a brush over top of the deeper shade, Ravish, and had her press her lips together a few times to really combine the colors.  I finished the application by gently tapping the pads of my fingers over her lips to soften the texture. Combining the two shades on the lips in this way creates a real depth to the mouth and wears wonderfully.

Finally, these are not products that Spirit has in her online boutique, as they’re not ‘green’, but I really like how they look and haven’t found an alternative that I like quite as much.

On her brows:

I used Laura Mercier Brunette Brow Pencil and Paula Dorf Brow Powder in Neutral

On her lashes

I used Covergirl Lash Blast in very black – very sparingly on top and bottom.

I’ll be testing out using different cameras for these how-to’s. This one was taken with my cracked-screen iPhone, which I think will be going into retirement.  Regardless, Marla rocked this look incredibly well and everyone on set loved it. Note: We were shooting clothes for the Fall, when lip color gets more deep and eyes become a little more intense. Try a purple, a burgundy or a brownish-red this Fall and you’ll be totally on-trend.

Comments Off on Get The Look Numero Uno: Sheer taupe eye with a 2-dimensional red lip = Shazaam! | ...Here's how to

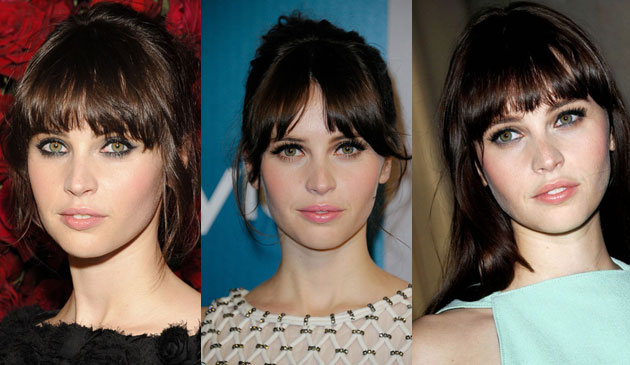
I love these looks I did on the gorgeous Felicity Jones: smouldering eyes, perfectly pink cheeks, sheer, natural lip color.

July 15th, 2012 — 8:51pm

Over the past few months, you may have seen this lovely English actress in all the fashion magazines as the new face in the Dolce & Gabbana ads(she nudged out the beautiful Scarlett Johansson), and pretty soon you’ll see her on the silver screen opposite Warren Beatty.  Felicity is a dream to work with. Not only is she really as sweet and funny as you’d hope she’d be, she also has a cool, defined style, yet she’ll let me play with her makeup a little bit to keep each red carpet look interesting.

This is one of those looks that works on many women, regardless of your age, skin tone, and comfort level when it comes to doing your own makeup: play up your eyes with a little smudgy liner, swipe on tons of mascara, (experiment with false lashes if you dare) and keep the rest of the face looking like you’ve just had some good exercise…or a little too much red wine: ever so slightly flushed in the cheeks. Not everyone will look right in a pink check and lip, but a similar pale shade to complement your skin tone  (could be a minimal bronzer on the cheek and a tawny lipstick if your skin tone is deeper) which shouldn’t be too hard to find.

As you know, I use a mixture of ‘green’ and mainstream products on most of my clients. As I’ve said before, I think it’s about limiting your overall exposure to certain ingredients, and if you have a specific black eyeliner that you adore that smudges just perfectly and stays put all night, then by all means, don’t feel badly about using it.

In all honesty, I don’t remember exactly which products I used on Felicity in each of these lovely images. I do know, however, exactly how I could create them using 100% good-for-you cosmetics. I love that the ‘green’ beauty products industry has come this far!

  1. Dr. Hauschka Rose Day Cream Light: For this look, a more matte complexion than what I normally like is in order. I skipped the face oil massage I usually do, and spot moisturized very lightly where needed.
  2. I love a smudgy black eye. Vapour Organic Beauty makes a deep black liner that smudges well and can be layered for intensity. I use a small blending brush to smudge the liner around, and into the lash line.  In the first photo I wet what’s called an ‘eyeliner push brush’ – a row of flat edged bristles that allows the creation of a sharp line – and dipped it into Alima Pure  Satin Matte mineral pigment eyeliner and pressed it along the outer edge of Felicity’s top lashes, creating a slight upturned cat eye.
  3. In the final photo I used a soft fluffy brush to sweep a sheer, reflective taupe shadow called ‘magnetic’ from Kjaer Weis, under her bottom lashes.
  4. In all photos, of varying degree, I swirled one of the following onto the very top of her cheek: RMS lip2cheek in ‘Smile’, Kjaer Weis cheek cream in ‘Blossoming’, and set it with one of the following: Dr. Haushka blush in Natural Pastels, Rouge Powder Duo or Korres blush in #16 Pink/Rose. . I swept the face with a large soft brush to blend the cheek color seamlessly.
  5. Felicity being a fan of a neutral or pale pink lip makes this part super simple. I love that she knows I’ll ask her if she’s exfoliated her lips when I arrive to do her makeup, and generally beats me to the punch, showing me the washcloth she’s been gently rubbing against her mouth. For the natural look she likes, try using ‘Caramel’ or ‘Strawberry’ Lip Shimmer, or ‘Honeysuckle’ tinted lip balm, both from Burts Bees, the new fuchsia lip shine from RMS Beauty in ‘Sublime’, or the Tinted Lip Conditioner from Ilia in ‘Nobody’s Baby’.
  6. I’m not usually a fan of a powdered face, but this look asks for a little powder in the t-zone. I like each of the three from Jurlique; they have different scents associated with different skin types, but with how minimally I tend to use them, I can’t say I’ve noticed any difference in performance.

In general, my favorite part of any look is the lashes. It’s fun to layer on the mascara or really play up the drama with a strip of falsies, or with a few individual clusters spaced along the outer edge of the top lid. Send me your photos via my Facebook page of how you do this type of look on yourself. I can’t wait to see!

Thank you, lovely Felicity, for wearing my art work so well.


Comments Off on I love these looks I did on the gorgeous Felicity Jones: smouldering eyes, perfectly pink cheeks, sheer, natural lip color. | ...Here's how to

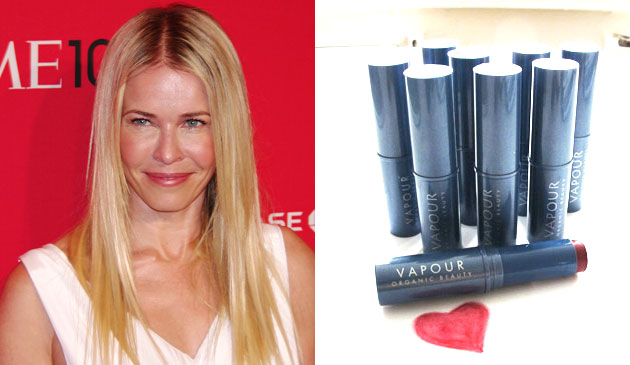
Vapour Organic Beauty does it again: Chelsea’s rosy cheeks couldn’t be more perfect!

May 23rd, 2012 — 2:40pm


You know when you find a product, or a few products from one company, that with barely any effort on your part, make you look GREAT? Great, in the way that everyone who sees you asks if you’ve been on vacation, or if you’re trying something different with your hair… that way in which you look so naturally good and polished that no one can tell what’s different?

Well, Vapour Organic Beauty’s multi-use cheek and lip color has been that for me for quite some time, now.

About two years ago I was lucky enough to receive some of their best selling cheek and lip stains and multi-use cheek and lip colors. I sorted through them, picked out my favorites for me and few friends – all of us with different coloring – and immediately put Courtesan 213 on my cheeks.  I looked like I’d just been in an hour and a half yoga class – alive, glowing, and somehow peaceful and happy. That’s a lot to ask of a cheek color, but I kid you not – that’s how I felt, and as the days (and now, years) have passed, I continue to get that positive reinforcement from those around me when I wear it – so I know it’s true.

I know that many of you are hesitant to use a cream cheek color. I know this because I get emails about it, and people will often ask me when I teach classes or am interviewed for articles: how do I apply it? Will the color stay throughout the day? Will it make me break out?

All great questions, and after many years of using cream cheek colors (from NARS’ multiples to 3-custom color sheer cheek stains, to those from the natural brands that are taking the cosmetic world by storm: RMS, Kjar Weiss, Revolution Organics, Isa’s Restoratives, and of course, Vapour), I know that cheek creams across the board are my personal favorite, both for work and on my own face.

I encourage you to try it on a well moisturized face (but let your moisturizer or oil sink in for a few minutes before applying your cheek color), with clean fingers, and just press the color into the apples of your cheeks – the part that perks up when you smile. Use your fingers or a brush or a sponge to tap and blend so that you can’t see the edge where the color begins to fade off your apples. I often set the cheek color with a sheer application of a corresponding powder blush if I know I (or my client) won’t have a chance to look in the mirror to refresh. That’s the only complaint that I have heard about cream cheek colors -particularly about those from the natural brands – that color tends to fade as the day wears on. My response: it’s a good thing we carry purses! Reapplying is not a bad thing! We should be looking in the mirror half way through the day to see how we’re presenting ourselves to others, no?

On the lovely Chelsea I used a very sheer application of Vapour’s Aura Stain in ‘Impulse’, and I applied it with my fingers to her very well moisturized cheeks, and then I used a brush to blend the edges seamlessly. Impulse is a very intense color and if you apply it from the tube, or more densely with your fingers, you’re going to get a lot of color deposit. My friend came over the other day wearing it as a lipstick and it was amazing – and very intense! It’s all about how you apply it, which is cool because you can personalize it, and create different looks with the same product. Two treats (or more) in one!

I topped off the center of each cheek with the most sheer application (this time applied with a wispy brush) of Vapour’s shimmer cheek color in Whisper. As you may know, I’m not much of a fan of anything with shimmer for real life, but in photo shoots, out at night, and on the red carpet, it can look awesome when applied sparingly, and camera flashes pick it up quite nicely.

One quick story: the day I received the package from Vapour about two years ago was a long and exhausting one, but when I got home from work around 10pm, I couldn’t help but open the bag and start trying everything. By midnight I’d sampled each piece, and I found myself doing something I don’t think I’d ever done before: I looked up one of the creators on Facebook and messaged him to tell him how much I loved the products. I sent him, essentially, a love note, at 1am! After I sent it I thought: he’s going to think I’m looney. Lucky for me, he must be a night owl, because I got the nicest message in response from him – at 2:30am!  Since then, I’ve had the pleasure to have spent time with the co-founder and formulator, Kristine Keheley. She’s one of those women who knows everything about ingredients, knows how to explain what she knows for the average person,and is both scientist and artist.

It makes me feel so good to have respect for, and actually like the folks behind the brands I use.


Comments Off on Vapour Organic Beauty does it again: Chelsea’s rosy cheeks couldn’t be more perfect! | ...I'll test it for you

Back to top