Tag: Burt’s Bees


Find your perfect signature lip color from the extensive new line just launched by Burt’s Bees!

March 10th, 2013 — 5:33am

burtsbeeskateyblog

In partnering with a brand, there were three main things that were important to me:

  1. That the brand maintains a commitment to using only ingredients that are safe to our bodies and the environment,
  2. That the brand has a price point within the reach of the average woman,
  3. That the color range be extensive and include shades to flatter women of every skin tone.

I’m so grateful to Burt’s Bees for turning my ideal partnership into a reality. Together we made some videos with three great beauty bloggers, to introduce you to Burt’s newest lip lines- lip glosses, and lip shines – and to better acquaint you with their already existing line of lip shimmers, as well as their tinted lip balms – including the three latest additions. In the videos I show you how to do what I do best – layer colors and textures to create signature looks.  This is a line of colors that I use on my own lips all the time now, and quite a few of them have already made their way onto the lips of my red carpet and photo shoot clients.

I really love the Lip Color Finder that the Burt’s team created – and I tested for accuracy – which is a really cool online tool that leads you through some questions to learn which colors in each of the textures will be best on you.

The video shoot was fun (but seriously exhausting. Please, have a ton of respect for models and actresses for the long hours and intense work they do. It’s definitely not as easy as it looks), but always so weird to be on the receiving end of styling, hair and makeup! Thanks to my team for making me feel great.

A special thanks to the awesome beauty blogging team, who gave their honest feedback: they loved the colors we picked for them!

Alexis Wolfer, thebeautybean.com

Amber Katz, beautybloggingjunkie.com

Jeannine Morris, beautysweetspot.com 


Here are a couple behind the scenes pics from the day we filmed:

BBbehindthescenes1

bbbehindthescenes3


Comments Off on Find your perfect signature lip color from the extensive new line just launched by Burt’s Bees! | ...Here's how to

show off your love for spring with a pretty pink pop

March 8th, 2013 — 5:38pm

angelahighsmithforblog

It’s always a real learning experience for me when model Angela Highsmith sits in my makeup chair.  Early on we discovered our shared passion for all things natural, and my respect for her body of knowledge grows every time we spend a day on set together.

At some point she told me that she brews up a tea for her daughter (this youthful beauty is a mom to a 10 year old) from an herb called Skullcap to ‘help chill her out before school’, and then went on to tell me about her herb garden and all the concoctions she makes to treat cuts and bruises from what she has growing in her own back yard. I recently introduced skullcap tea into my repertoire of ways to chill myself out and get ready for bed… and it actually does the trick!

Her knowledge of making her own medicines doesn’t stop there: she treats a variety of sensitive skin issues with oils, salves, and cold creams made with her own two hands, and a wealth of information she received during the many classes she’s taken at the New York Open Center, and in one-on-one sessions with herbologists.

When I asked her how she became interested in herbs, and the world of natural beauty products, she told me that she’d been interested in natural healing ever since she was a little girl, and that she used to make believe she was a Native American living off the land, with only what she found in her yard to eat, and to survive. As she’s gotten older, she explained, the natural products she uses become more and more natural: from using store-bought products with naturally derived ingredients, to focusing on searching out organic and edible products for skin and hair, to now making a good number of what she and her family uses, all by herself.  Very crafty and smart of you, Angela! Can I come over one day and see your garden?

On the day of this photo shoot I created a naturally glowing look with the following products – and even the most discerning green beauty aficionado would approve:

1.     Amala cocoa bean face oil massaged into Angela’s sensitive skin

2.     Vapour Organic Beauty liquid foundation used sparingly, starting from the center of the face, and blending outward

3.     Mineral Fusion concealer under her eyes very sparingly

4.     RMS cream eyeshadow in ‘Seduce’ on just her lids, applied with my fingers

5.     Onto curled lashes I applied a few coats of Honey Bee Gardens mascara in black

6.     Dr Hauschka bronzing powder swirled along her temples and across her cheekbones

7.     Burt’s Bees lip shimmer in Watermelon topped with a light coat of Burt’s Bees lipgloss in Spring Splendor

We both loved this fresh, gorgeous look (with just a pop of lip color) so much, that I thought to take a photo of her at the end of the day after she’d changed back into her street clothes. Can you believe this shot was captured at the end of an 8-hour day on set? Just beautiful, Angela, just beautiful!


Comments Off on show off your love for spring with a pretty pink pop | ...Here's how to

A look inside my purse, and inside my past

February 9th, 2013 — 7:17pm

beautybanter_tboiiphoto

On the heels of my first televised interview (I’ll post a blog with the video in it soon) describing how I made my way from my previous career as a social worker to the world of makeup, I thought it fitting to share with you this bit of my back story… as well as what I’m currently carrying in my own personal makeup bag, as I told it to Sarah Howard, of beautybanter.com. 

“My first real intro to makeup started when I was 8. I was going to a friend’s house for a sleepover party, and out of the blue, my mom gave me a big ziplock bag of all sorts of products from the back of her makeup drawer. The ones that still stand out in my mind consist of a super shimmery grey eyeshadow, electric and pale frosty blue eye shadows, intensely pigmented peachy pink liquid cheek color, and an orange lipstick in a gold tube that I doubted she ever wore. I packed that ziplock full of tricks in my overnight bag and I was the hit of the party.

Soon thereafter it was my birthday and my mom invited her friend, who I vaguely remember was a makeup artist – maybe at a local department store counter – over to do makeup on all my friends. We still have the photos, and it was the first time I saw my blonde/red eyelashes with mascara – and I LOVED it. I couldn’t believe I had eyelashes like everyone else’s- dark and thick and framing the shape of my eye! That was the beginning of me begging to wear makeup, and my interest in all things beauty.

I got sidetracked for most of my early career-life, devoting my time to being a social worker  – which couldn’t have been the furthest thing from the world of beauty or fashion- my own wardrobe not excluded. The one thing that I did insist upon was introducing ‘beauty days’ to my clients – particularly around special days like mothers’ day, or valentines’ day – where I’d either collect products to pamper them, or bring in makeup or hair artists to give on-site makeovers to the lovely ladies who came in to my office for help.

I had the most gorgeous clients – of every skin tone, hair type, and ethnic background. I remember there would be times when I was floored by the beauty of a mother and daughter from west Africa, both with amazing skin, draped in gorgeous fabrics of rich color, or the stunning Latina clients with deep dark eyes and features that women pay plastic surgeons to recreate on their own faces. I was also really lucky to work with a large transgender population, and in particular, male-to-female transgendered folks who frequently dressed as women. It was from those clients that I learned the fantastic transformative power of makeup, and I knew I wanted to make a switch to try my hand at the beauty industry full-time.

I didn’t know enough to be scared, so I marched into all the different agencies and eagerly told the agents who would speak to me that I was willing to work for cheap, and that I wasn’t a kid who would screw around on set – I was there to work! It all happened so quickly, and after assisting some of the best for about a year, the agency that I love – The Wall Group – offered to sign me as their first makeup artist on their brand new emerging talent board.

That was nearly 6 years ago, and I can’t believe how far I’ve come, and how much I love this industry. I began my career in social work helping women feel better, and I love that I still get to do just that, every single day. I’m extremely passionate about the burgeoning green beauty component, and love finding out about new products made with ingredients that are safe enough to eat.

This year I decided to leave NYC and spend awards season in LA, rather than flying back and forth. Plus, I hate the cold so it wasn’t a difficult decision. Award season is full of excitement for me. I love working with the beautiful and funny Isla Fisher, and got to switch up her look a lot for the Golden Globes (pictured) – and she loved it. Doing makeup on the gorgeous and talented actress, Amanda Seyfried, is always such a treat as well. I like doing all kinds of makeup, but what I like most, is making a face we’re all familiar with really dazzle on the red carpet. Nothing is better for me than when I hand my client the mirror after finishing creating her look and seeing her eyes widen and a smile spread across her face as she takes in her reflection.

  • My makeup bag is from Kahina Giving Beauty. They make fantastic products and give back so much to the Berber women in Morocco who make them. The products in my bag are simple but contains exactly what my staples are when doing a red carpet look.
  • Dr. Alkaitis Universal Mask: I carry the sample size in my purse just in case I travel and forget to bring the full size! This green mask is truly therapeutic – it soothes, nourishes, and calms my skin when it’s inflamed or broken out. The key is to keep it damp while it’s on your face – spritzing with water or hanging out in the shower, letting the steam keep it damp.
  • Vered Organic Botanicals Balancing Face Oil: It’s an herb infused oil that contains anti inflammatory and anti bacterial components. My skin is so sensitive, and I love that this one never irritates it and I think, calms my breakouts. I use it day and night, and I’m never stingy with application. I only use oils on my clients, too which I know is why they always glow on the red carpet.
  • Shu Uemura Eyelash Curler: Simply the best. Change the pad every 6 months, and get a new one every year, if you use it daily. Clamp it as close to the roots as you possibly can and your eye will instantly open. Every actress I work with knows I’ll be curling the hell out of her lashes.
  • Cover Girl Lash Blast Mascara Very Black: I’m obsessed with lashes. This is my favorite, despite it not being a ‘green’ beauty product. I don’t care – it does the job and gives long, thick, lush lashes that stay all day- and I use, like, 10 coats.
  • Kjaer Weis Lip Tint in “goddess”: I love this deep rich color, and that it’s sheer while still well pigmented. I love to use it on my cheeks, too! It looks awesome on so many skin tones, as well, and the color is totally buildable.
  • Burt’s Bees Tinted Lip Balm in Sweet Violet: this is my go-to for every day, all day. I have a zillion of them. It’s 100% natural and such an awesome color. It’s also what I like to give my clients for the after party when I know they’re not going to be interested in keeping up their precise lipstick look that I created for them. This is easy, moisturizing, and full of color, and there are a number of other colors, so I can pick the one that matches each client best.
  • Zoe Organics 100% Organic Everything Balm: I use this delicious little stick on everything – scrapes, rashes, bites, rough cuticles- you name it. I have one in my work makeup kit and use it all the time when I want to moisturize shoulders and upper arms, but can’t risk getting any oils from lotion or cream into the hair (or the hairdresser will kill me!)
  • Ilia Beauty Balmy Days Lip Balm: When I don’t feel like having any color on my lips, this is my favorite. It’s full of coconut oil and feels delicious. I give them out to clients to use at night leading up to red carpet events because they’re so penetrating and rich – they get a pout ready!
  • Tata Harper Aromatic Stress Treatment Roll-On Oil: I keep this with me at all times, both to bring immediate relaxation to myself and my clients. I always roll some on my wrists before I start a makeup application so my client can enjoy the effects of aromatherapy – particularly before stepping out onto the red carpet. They generally ask to have some put on their wrists before leaving the house, too!
  • Roots Rose Radish: The pretty little open shell on the right of the photo is another scent that I love from a really cool company started by a woman who’s a trained herbalist – and a doula! – and she makes everything she sells. This one is freakin’ delicious: rose, franinscense and patchouli – but not *that* kind of patchouli. It’s warm and earthy and rich and makes men go nuts in the best way when they smell it!
  • Celsius Bio Intelligence Scar Cream: My friend Spirit, of the best ever green beauty product website: spiritbeautylounge.com, gave this to me to try when I told her I’d gotten a bad burn on my finger. It’s full of healing ingredients and is all natural… and it worked! I keep it on me just in case anyone has a healing cut that needs a little TLC.”


Comments Off on A look inside my purse, and inside my past | ...We're all connected

show the world that less is more: super basic makeup 101.

December 24th, 2012 — 5:12am

miniblog

photo: Tim Bell

This is my beautiful friend, Mini Anden.  To have a conversation with her, you’d have no idea she was born and raised in Sweden because she doesn’t have a trace of an accent. We’ve known each other for a number of years now, and I absolutely adore her. She’s really intelligent, we have the same sense of humor   (I love it when she cracks us both up while I’m doing her makeup), and she’s a great listener and advice-giver. All of that mushy stuff aside, she’s an incredible model, and at just under 6 ft tall with a body that she subjects to intense workouts including a fusion of pilates and boxing known as piloxing (she has serious abs that I’ve actually tried punching just to see how strong they are – and they kinda hurt my hand!), she’ll have a career in front of the camera for as long as she wants.

She’s also a totally natural beauty. I really prefer how she looks mostly bare-faced, unless she’s been made up for an editorial photo shoot in a magazine with really intense makeup. Her eyes are incredibly blue, in that almost unreal, is-she-wearing-colored-contacts? way.  She’s also a perfect freckle-face, with tons of cute dots all over, although the size of this photo doesn’t let you see just how intense they are.

We shot the photo above after a long day on set, after she’d taken off most of the makeup I’d put on her for the day’s shoot. As you likely know from the makeup I do, I like to accentuate the beauty that already radiates from each woman, rather than drawing her a new face on top of the one that exists. In Mini’s case, I wanted to show how just a little eye makeup and slight skin perfecting makes for a polished look.

We did a very basic touch up before putting her in front of a window, against a white wall with no fancy lighting or makeup tricks used.

The products I used were:

Toning Mist, Kahina Giving Beauty: I had Mini close her eyes, and on her freshly washed face, I generously sprayed this mist to help replenish moisture and calm her skin.

Facial Lotion, Kahina Giving Beauty: I’d already given Mini a face massage with oil earlier in the day, so for this photograph I opted to use a less dew-inducing option, while still offering great hydration.

Shu Uemura Eyelash Curler:  I know many people are scared to curl lashes once they’ve been coated with mascara, but if you do it carefully, and just barely tap the curler when you’re holding it just at the root, you’ll be fine. NO TIGHT SQUEEZING here, please. You’ll take off the mascara where the metal touches your lashes and have a blank space that no amount of recoating will really help cover.

‘Cloud Nine’, Kjaer Weis Eye Shadow: This is one of those really flattering (for fair to medium complexions) champagne/ivory shades with a pearly finish that does a great job of illuminating the eye without leaving behind those horrible bits of glitter. Using this MAC brush I like to place the eyeshadow in the inner corners of the eye, in the very center of the lid, and trace a bit underneath the bottom lashes. I then use my clean finger tip to gently blend the shadow into the skin in the inner corner, and generally I’ll use this brush from Laura Mercier to buff the shadow into the lid.

Black Eyeliner, Vapour Organic Beauty:  Just a light smudge of an eyeliner swiped and pressed into the under side of the outer edge of the top lashes, and then wiggled in between the lashes, and maybe even just a teeny bit smudged on top of the outer edge of the upper lash can do a lot to emphasize the eye without making it look made up.  Depending on the shape and color of your eye, you might find your eye looks best with the entire inner rim lightly darkened, but for most almond shaped eyes, accentuating the outer upper lash line is just enough.  You can try this look with a brown, gray, taupe, or even purple or navy liner to see which you like best.  Different colors will accentuate your eye color ; for me a dark purple liner will not so much read as ‘she’s wearing purple!’, but will simply make the green of my hazel eyes pop.

Very Black, Lash Blast Mascara by Covergirl: I love dark black lashes, even if it’s just a light coating. As I’ve said countless times, this mascara is super black (whereas so many others are more of a light black, almost gray), and can be layered for a more intense look. If you read my blog because you’re looking for only ‘green’ beauty recommendations, I apologize – this isn’t one of them!

Concealer, Mineral Fusion: I like these concealer duos because similarly to the much acclaimed Laura Mercier secret camoflauge duos, you can blend different amounts of the two colors together to get the exact shade you need for the specific part of your face on which you’re laying the product. Under your eye, for example, you’ll want to use a high concentration of a peach/orange concealer to combat the purple – trust me, it totally works. I’ve used straight orange pigment to cover super dark circles under the eyes of women with very deep complexions with great success. Then you blend the more skin-colored shade over top and pat with your ring finger to create a seamless cover on the skin.

On most faces I concentrate on coverage under the inner 1/3 of the eye (never put concealer under the outer 1/3 of the eye unless you want to accentuate your fine lines and wrinkles!), underneath, and around the outer edges of the nostrils, and on any spots or redness/discoloration you may have, but only if you ensure you’ve blended both the color and texture into your skin so that you’re not just highlighting the spot.  For small blemishes, using a really tiny brush like this with a concealer that matches your skin exactly can be helpful.

Bone Beige, MAC sculpting powder: I often swirl this underneath and on to cheekbones as a sculpting powder and I like it, as well, as a non-shimmering bronzer. On Mini, I lightly underlined her cheekbones with Bone Beige using this contour brush.

Freja, Luminous Shimmer Blush, by Alima Pure: I’m usually against products with particles of glimmer, but in this case, they’re really very small, and the color and glimmer combine nicely to give a very-barely-there-pink to the apple of the cheek.

Honey Lip Balm, Burts Bees: Mini put this on herself, as per usual. Ever since I can remember, I’ve seen Mini with this little yellow tube in her pocket, purse, or hand. I can honestly say, it does her lips right, and I’ve never seen them chapped!


Just for fun, here are two shots of Mini that I love that really show how transformative a little makeup/hair/styling can be. Note her dark eyebrows in the first one. They look incredible for this photo, but would look shocking if you ran into her at the grocery store looking like that.

minibazaar

minifur

minisisley


One last endearing thing I’ll leave you with about Mini is that she and her husband, Taber, have a house full of dogs. Mini tweets pictures of them in various positions that make me laugh and laugh. I took an immediate liking to Gus, the skinniest, long-nosed munchkin in the center of the first photo; i think it’s because we resemble one another.

minipupsinsunshine minicincodemayopup minipupsoncouch minixmaspup

Thank you, Mini, my love!!!


Comments Off on show the world that less is more: super basic makeup 101. | ...Here's how to

More reasons to love the Fall… Rich berry colored lips!

October 13th, 2012 — 12:23am

Fall: It’s that sweet spot between end of the summer and the start of the holiday season. It’s time for you to break out those gorgeous fall lip colors and see how fun they are to wear. Choose from a barely there sheer wash of color, super pigmented mattes, and glossy payoffs.

A good number of you have asked me for a lip color round-up to introduce you to some of the shades we see this time of year on the runways and red carpets:  deep, rich plums lipsticks, purple-y red glosses, satin-finished blackberries, and sheer merlot stains. It’s not always easy, though, to gauge just how this type of color is going to look on the lips.

The finished product not only depends on the way in which you apply:

1. directly from the tube, with a heavy hand, in a smeared, back-and-forth motion;

2. from the tube, but only lightly dabbing the stick onto your lips;

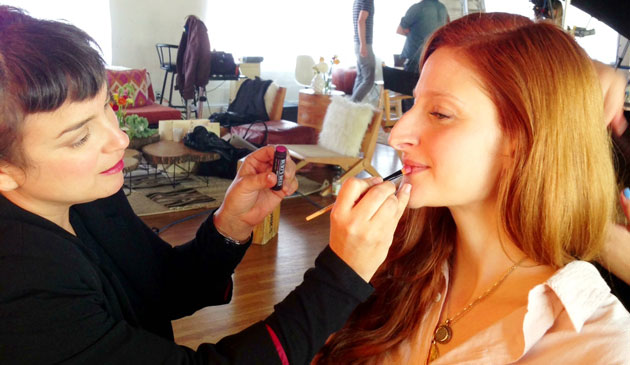
3. with a lip brush to make a precise edge;

4. by tapping your finger from the tube to your lip, adding layers of pigment until you reach the desired intensity level,

but it also depends heavily on what your natural lip color is before you start applying.  Those with a lot of pink or red in your lips are going to find that the deep purple wine stains can take on a completely different hue, and those of you with a really deep brown color to your lips may find that some of these shades disappear completely on you, or never show up with enough intensity, no matter what you do.

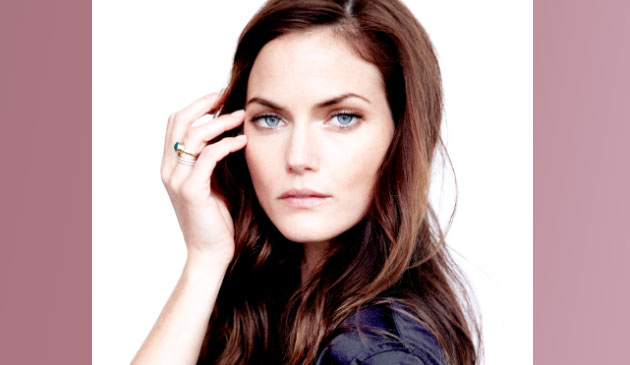
All of that said, it’s really difficult for someone like me (or a makeup company, for that matter) to definitively advise you on what to buy based on how you look sans lip color.  I can however, suggest shades to play with, and tell you my favorite ways to apply them. What should ultimately influence your decision when you’re standing at a makeup counter, or staring at lipstick swatches on the screen of your computer, wondering: when was the last time my  laptop’s color temperature was calibrated? [NEVER?!] are variables like: your eye color, your hair color,  your skin tone, your clothing color palette, your mood…

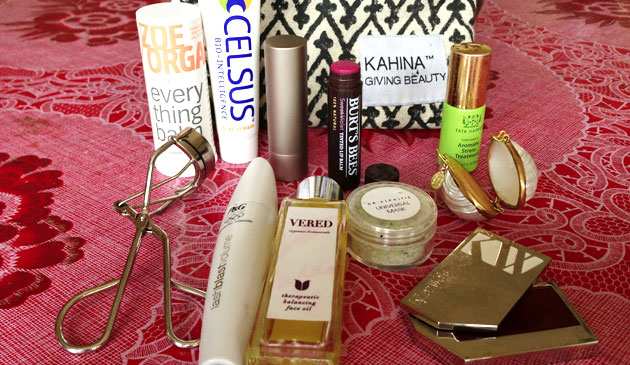
In no particular order (really, just the order in which I pulled them out of my big ol’ bag of lipsticks), here are some of my favorites. Those of you who follow this blog based on our shared love for ‘green’ beauty options, please take note that there are a handful of lip colors that don’t fall into that category, however, they’re such rich and dense shades – shades which are not readily available (or at least not that I know of!) in the all-natural world of lip color – that I often use them on photo shoots when I need that intensity. I did just check Jane Iredale’s webiste and found that she has a few deep purple shades that I have not yet tried.

HOW TO GET: NOT TOO HEAVY, NOT TOO LIGHT: THE PERFECT APPLICATION OF COLOR

When you’re new to wearing these shades, it can be overwhelming to see yourself with a thick application of. let’s say, Ilia’s ‘Ink Pot‘, or Mac’s ‘Rebel’ (which are very similar in color).  Instead, try tapping the lipstick onto your lightly lip-balmed lips, or use your ring finger to tap a good amount of product from the tube, and then press the pigment into your lips. This is how I generally apply all lipstick, even on myself. It helps to ensure less caking along the corners of your mouth as the hours pass, and through the act of pressing the product into your lips, you’ll find it sticks around longer than if you simply swipe the tube across your pout once or twice.

HOW TO GET: SHEER COLOR WITH A DEWEY FINISH

There are a multitude of great sheer options on the market that are easy to apply, and the more swipes across your lip, the deeper the shade becomes. My top favorites include: Burt’s Bees Lip Shimmer in’Prune’ and Kjaer Weiss’ ‘Sensuous Plum’.

HOW TO GET: SHEER GLOSSY LIPS

Trying out a lipstain, like ‘Quickstep or ‘Foxtrot’ [Foxtrot not pictured below]’ from Josie Maran is another great way to become acquainted with these shades. To start, color the marker onto UNMOISTURIZED lips (this is important to ensure the color will adhere), and then try following up with a gloss, like the gorgeous blackberry one from Vapour Organic Beauty in ‘Bitten‘, or their more chocolate shade ‘Risque‘. This makes for a luscious and easy to wear fall shade.

HOW TO GET: INTENSELY COLORED, MATTE OR SATIN FINISH LIPS

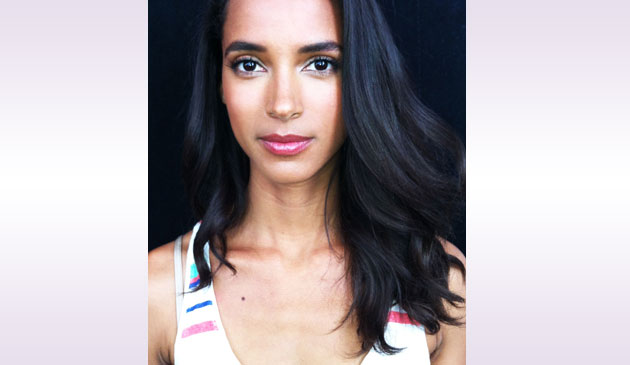
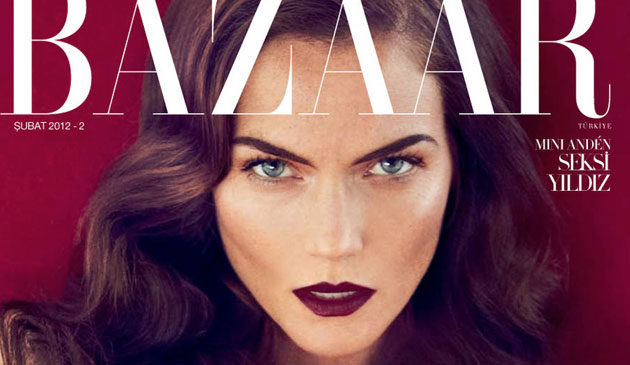
If you’re going for a much more dramatic look, make sure that your lips have been moisturized, but then blot them with a tissue, to ensure that your deep lipstick of choice adheres evenly, and depending on the look you’re going for, you might want to lightly outline your lips in a similar shade lipliner to ensure the color doesn’t bleed.  I wouldn’t advise that a dramatically deep, highly pigmented purple or merlot shade (like the one pictured on the model in the photo on the right) EVER be  highly glossy (i.e. adding gloss on top of the lipstick) in real life (a photo shoot is a different story). It’s guaranteed to slide off your lips, appear blotchy, and get on your teeth. This means that a super deep shade should be in a matte, satin, or have a super light dewey finish. It’s a great idea to lightly touch a tissue onto a closed mouth to ever so slightly remove excess product. My picks to accomplish this kind of look: NARS, ‘Train Bleu’ matte lip pencil, Chanel ‘Rouge Noir’ Lipstick, MAC Smoked ‘Purple Matte’ Lipstick, and Vapour Organic Beauty ‘Siren Bold’ Lipstick.

HOW TO AVOID:  THE DREADED LIPSTICK ON YOUR TEETH LOOK!

My grandmother showed me the best way to ensure that this embarrassing faux pas doesn’t happen:

1. after applying your lip color, open your lips into an ‘O’ shape.

2. grasp a cotton swab by the middle between your pointer finger and thumb, placing one end of the swab into your mouth, keeping your fingers on the handle, just outside of your mouth with the other cotton bud end pointing straight out, parallel to    the floor.

3. Pucker your lips like you’re  blowing a kiss around the handle of the swab, and gently pull the swab out of your mouth, making sure the inside of your lips comes in contact with the cotton as it leaves your mouth.

4. Repeat with the other side of the swab.

Voila – all of the excess color that would’ve ended up on your teeth has been swept away! Packing a few q-tips in your purse is always a good idea, to use for this trick, or to clean up fallen mascara.

The final two shades on the bottom right of the photo below are soon to be released, are part of the ‘green’ family of beauty products, are super affordable, and super beautiful. Once they hit the market I promise to tell you who makes them!

Happy leaves-changing, sweater-wearing, chilly hands, feet, and noses, FALL WEATHER everyone!


Comments Off on More reasons to love the Fall… Rich berry colored lips! | ...Here's how to, ...I'll test it for you

I love these looks I did on the gorgeous Felicity Jones: smouldering eyes, perfectly pink cheeks, sheer, natural lip color.

July 15th, 2012 — 8:51pm

Over the past few months, you may have seen this lovely English actress in all the fashion magazines as the new face in the Dolce & Gabbana ads(she nudged out the beautiful Scarlett Johansson), and pretty soon you’ll see her on the silver screen opposite Warren Beatty.  Felicity is a dream to work with. Not only is she really as sweet and funny as you’d hope she’d be, she also has a cool, defined style, yet she’ll let me play with her makeup a little bit to keep each red carpet look interesting.

This is one of those looks that works on many women, regardless of your age, skin tone, and comfort level when it comes to doing your own makeup: play up your eyes with a little smudgy liner, swipe on tons of mascara, (experiment with false lashes if you dare) and keep the rest of the face looking like you’ve just had some good exercise…or a little too much red wine: ever so slightly flushed in the cheeks. Not everyone will look right in a pink check and lip, but a similar pale shade to complement your skin tone  (could be a minimal bronzer on the cheek and a tawny lipstick if your skin tone is deeper) which shouldn’t be too hard to find.

As you know, I use a mixture of ‘green’ and mainstream products on most of my clients. As I’ve said before, I think it’s about limiting your overall exposure to certain ingredients, and if you have a specific black eyeliner that you adore that smudges just perfectly and stays put all night, then by all means, don’t feel badly about using it.

In all honesty, I don’t remember exactly which products I used on Felicity in each of these lovely images. I do know, however, exactly how I could create them using 100% good-for-you cosmetics. I love that the ‘green’ beauty products industry has come this far!

  1. Dr. Hauschka Rose Day Cream Light: For this look, a more matte complexion than what I normally like is in order. I skipped the face oil massage I usually do, and spot moisturized very lightly where needed.
  2. I love a smudgy black eye. Vapour Organic Beauty makes a deep black liner that smudges well and can be layered for intensity. I use a small blending brush to smudge the liner around, and into the lash line.  In the first photo I wet what’s called an ‘eyeliner push brush’ – a row of flat edged bristles that allows the creation of a sharp line – and dipped it into Alima Pure  Satin Matte mineral pigment eyeliner and pressed it along the outer edge of Felicity’s top lashes, creating a slight upturned cat eye.
  3. In the final photo I used a soft fluffy brush to sweep a sheer, reflective taupe shadow called ‘magnetic’ from Kjaer Weis, under her bottom lashes.
  4. In all photos, of varying degree, I swirled one of the following onto the very top of her cheek: RMS lip2cheek in ‘Smile’, Kjaer Weis cheek cream in ‘Blossoming’, and set it with one of the following: Dr. Haushka blush in Natural Pastels, Rouge Powder Duo or Korres blush in #16 Pink/Rose. . I swept the face with a large soft brush to blend the cheek color seamlessly.
  5. Felicity being a fan of a neutral or pale pink lip makes this part super simple. I love that she knows I’ll ask her if she’s exfoliated her lips when I arrive to do her makeup, and generally beats me to the punch, showing me the washcloth she’s been gently rubbing against her mouth. For the natural look she likes, try using ‘Caramel’ or ‘Strawberry’ Lip Shimmer, or ‘Honeysuckle’ tinted lip balm, both from Burts Bees, the new fuchsia lip shine from RMS Beauty in ‘Sublime’, or the Tinted Lip Conditioner from Ilia in ‘Nobody’s Baby’.
  6. I’m not usually a fan of a powdered face, but this look asks for a little powder in the t-zone. I like each of the three from Jurlique; they have different scents associated with different skin types, but with how minimally I tend to use them, I can’t say I’ve noticed any difference in performance.

In general, my favorite part of any look is the lashes. It’s fun to layer on the mascara or really play up the drama with a strip of falsies, or with a few individual clusters spaced along the outer edge of the top lid. Send me your photos via my Facebook page of how you do this type of look on yourself. I can’t wait to see!

Thank you, lovely Felicity, for wearing my art work so well.


Comments Off on I love these looks I did on the gorgeous Felicity Jones: smouldering eyes, perfectly pink cheeks, sheer, natural lip color. | ...Here's how to

join me for my next class at Whole Foods in NYC: Clean & Green Makeup and Skincare!

May 6th, 2012 — 8:00pm

I had so much fun teaching my first class at Whole Foods on Houston and Bowery here in NYC a few months ago that I’ve scheduled another one for next week. I’m sorry I didn’t post this sooner, because I hear it’s nearly sold out, but if you’re free on Monday, May 14th from 7-9, I’d love to see you!

The class is held in the kitchen where cooking lessons are given, and it’s a good thing because in addition to discussing the best in clean** makeup and skin care – and not just those sold in Whole Foods – we’ll also make one or two of our own facial treatments with products found right in your kitchen, and we’ll package them up so you can try them for yourself in the comfort of your own home!

**I can’t figure out which word to use to best describe products that are as free from potentially harmful chemicals as possible: green? non-toxic? healthy? natural? you get the picture?

You can click HERE to register.

My friend photographed and shot video of the last class (thank you, Michelle!)  and the most fun images were taken during the eyelash curling session. I love watching the delight on each person’s face when they see how wide open their eye looks after I teach them how to curl.  It was such a hit that I’m sure we’ll do it again on the 14th.

Some shots from my makeup/skincare table:

…and a little video for your viewing pleasure (again, thanks to my good friend Michelle for shooting and editing). Does anyone know how to keep the advertisements from popping up along the bottom of it? Darn ads!

Another big thank you to my friend, and model, Tanya Sweet, who looks amazing in a red lip!


Comments Off on join me for my next class at Whole Foods in NYC: Clean & Green Makeup and Skincare! | ...We're all connected

Back to top