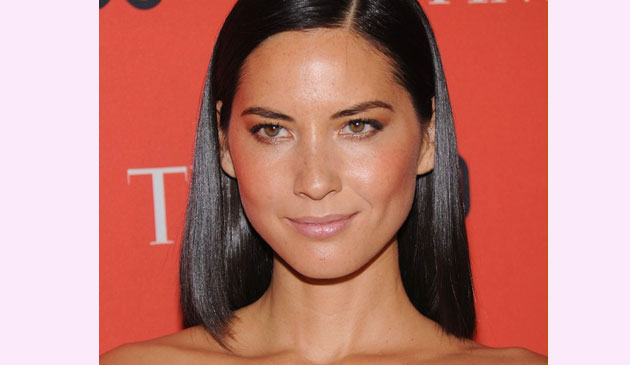
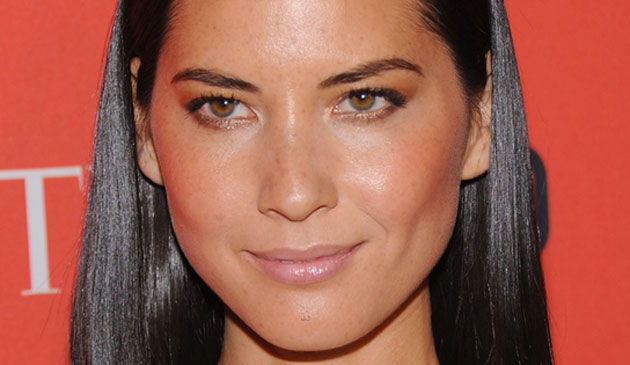
This image was taken the first time I worked with Olivia a few months ago. I’d always admired how great her makeup looks on the red carpet, and always thought she was one of the most beautiful actresses around. Olivia definitely knows how she looks her best – from the shape of the eyeshadow, to the angle of the eyeliner, and the placement of contour and cheek color. She shared with me that she’s worked with a fantastic makeup artist in Los Angeles for many years, and from the pictures she’s shown me from the events where she’s done her own makeup, it’s obvious that she, herself, seriously knows how to paint her own face – and put on false eyelashes better than anyone else I’ve ever known!
Before I tell you how to recreate this makeup look for yourself, I want to share with you this story:
Recently I arrived at Olivia’s hotel room to do her makeup for a TV show appearance. Before taking a seat in front of me, she reached into her purse and pulled out small bag containing a bottle of nail polish and a bottle of polish remover she’d just picked up at Whole Foods. I was so excited (as only a green makeup artist can be) by what I saw. Of all the options she had between the equally as close in proximity drug store, mainstream grocery store, and beauty supply shop, she made it a point to spend her dollars on nail products that are made by companies that have made a concerted effort to be as toxin-free as possible. The color was a killer shade of red, and the remover worked extremely well to remove the polish she started out wearing. It’s the little purchases like this that say a lot. Companies that attempt to do better for the environment and for their consumers need our support.
Just one more reason why I’m so stoked to work with Olivia. Plus she personally makes the rounds to say thank you, and shakes the hand of every single person that had even the smallest roll on whatever photo or video shoot she’s working on. Who does that?! Olivia does, and it makes everyone feel *so* good.
Okay, back to telling you how you can make your own face glowy and bronzed:
FACE:
- I favored a really dewy complexion for this glowy look. I started with a tiny bit of La Bella Figura’s Rainforest Hydration Treatment and thoroughly massaged it into her face and neck. A little goes a long way to intensely hydrating skin. I waited about 20 minutes until it had fully absorbed to begin perfecting her skin, which works out well since I always start with eye makeup first.
- Once I finished her eyes, I used Vapour Organic Beauty’s Atmosphere Luminous Foundation Stick, applied with a small foundation brush, and worked it into the areas in need, patting it into place with a damp – but not at all wet to the touch – beauty blender sponge.
- I started building the bronzed glow by first laying down a layer of cream highlighter from RMS beauty (living luminizer) on the areas of her face that I wanted to reflect the most light in front of the paparazzi: the bridge of her nose, her cheekbones and her cupids bow.
- It wasn’t until I was nearly finished with the rest of her makeup, that I went back and mixed two colorful shades of Vapour cream cheek stick color in Torch and Courtesean on my small, fluffy brush, and swirled them around the apples of her cheeks, just to give a brightness to her face.
- Then I went to work with my favorite Dr. Hauschka powder bronzer, placing it onto her skin with a large, fluffy, super soft powder brush. The trick when powdering on top of cream is to make sure the cream has set as much as it can, and then place the powder color on top with a large brush. If you buff it too much you run the risk of smearing the cream below and creating streaks.
- To finish her cheeks, I went back with a matte brown bronzer called Mauna Lao, from Alima Pure to add more definition to her cheekbones, and I softly placed the powder underneath them with a small eyeshadow blender brush, to really make them pop.
ON HER EYES:
- I love Kjaer Weis’ eyeshadows and use them all the time. Here I placed ‘Charmed’ under her eye, and then over her entire lid, blending it upwards for a sheer application from crease to brow. Then I used my same Dr. Hauschka’s matte bronzer with a fluffy eyeshadow blending brush to create a little depth in her crease, particularly towards the outer edge.
- It’s no secret that I love some serious lashes, so I curled the heck out of hers, and then applied 400 coats of covergirl lash blast, in very black (and a few individual fake lashes from Ardell for a little extra depth)
- I filled in her brows with a deep brown brow pencil
ON HER LIPS
- I used my favorite layering technique (some say I layer too much, making it impossible to afford to recreate what I’ve done, but I think it’s important to have a full lip wardrobe, and fun to make your own color), starting with a layer of Ilia’s Come Undone nude crayon, and topped it with Burt’s Bees Lip Gloss in Ocean Sunrise, and finally, tapped a bit of Burt’s Bees Lip Shine in Wink onto the middle of her bottom lip.
Et voila.
Thanks to Glamour magazine for calling Oliva’s look out in July’s issue as a beautiful way to bronze!
Just look at that face! Gorgeous!


